
Your Simple Guide to Preserving Herbal Medicine
Welcome! Drying herbs properly makes the difference between vibrant, potent medicine that lasts for months and moldy, flavorless plant material that ends up in the compost. This guide will teach you the simple principles that ensure your herbs dry quickly, stay colourful, and retain their medicinal power.
Why Proper Drying Matters
Fresh herbs are 70-90% water. If you don’t remove that moisture quickly and completely:
- Mold grows (ruining your harvest)
- Enzymes break down the very compounds you want to preserve
- Colour fades (indicating compound degradation)
- Potency drops dramatically
The goal: Remove water fast enough to stop mold and enzymes, but gently enough to preserve delicate medicinal compounds.
Why this matters: You’ve just spent time growing or foraging these herbs. Proper drying means your summer harvest of mint can soothe winter colds, and your spring calendula can heal summer sunburns. Poor drying means you’ve wasted all that effort.
The Four Pillars of Perfect Drying
1. Low Heat (or No Heat)
Ideal temperature: 35-43°C
Why: Higher temperatures destroy volatile oils (those aromatic compounds) and heat-sensitive vitamins. You want warmth to speed drying, not heat to cook the herbs.
How to tell if it’s too hot: If it feels hot to your hand, it’s too hot for herbs.
2. Good Airflow
This is the most important factor.
Stagnant air = moisture just sits there = mold. Moving air carries moisture away from the plant.
How to achieve it:
- Hang herbs where air naturally circulates
- Use a fan on low setting
- Space herbs out—don’t overcrowd
- Choose an airy location (not a closed cupboard)
3. Darkness
Why: Light breaks down medicinal compounds, especially:
- Volatile oils
- Chlorophyll (green pigment)
- Some vitamins
How to achieve it:
- Dry in a dark room or cupboard
- Cover hanging herbs with paper bags (punch holes for airflow)
- Keep away from windows and direct sunlight
4. Low Humidity
Why: High humidity slows drying and promotes mold.
New Zealand consideration: Our climate is often humid, especially in North Island and coastal areas. This makes drying more challenging.
Solutions:
- Use a dehydrator (takes humidity out of the equation)
- Dry during drier seasons or after dry weather
- Use a dehumidifier in your drying space
- Be patient—humid-climate drying takes longer
Drying Methods: Choose What Works for You
Method 1: Hanging Bundles (Best for: Sturdy-stemmed herbs)
Good for: Rosemary, thyme, sage, lavender, mint, oregano
How to:
- Gather small bunches of herbs (5-10 stems)
- Tie stems together tightly with string or elastic band (elastic tightens as stems shrink)
- Hang upside down in a dark, warm, well-ventilated space
- Optional: Cover with paper bag with holes punched in it (catches falling leaves, keeps dust off)
- Check daily; ready when leaves crumble easily (5-14 days depending on humidity)
Where to hang:
- Spare room with fan
- Airing cupboard/hot water cupboard (HWC) with door ajar
- Garage or shed with good airflow (not damp)
- Above (not directly over) wood stove
- Apartment options: Above (not directly on) heat pump or dehumidifier outlet, in bedroom closet with small fan, near (not on) sunny windowsill with curtain closed for darkness
Not recommended: Kitchen (too much moisture from cooking), bathroom (humidity), closed cupboard (no airflow)
Method 2: Drying Screens/Racks (Best for: Flowers, leaves, petals)
Good for: Calendula flowers, chamomile, loose leaves, rose petals
How to:
- Make or buy drying screens (window screen stretched over frame works great)
- Spread herbs in single layer—don’t overlap
- Place in dark, warm, airy location
- Turn herbs daily for even drying (If daily turning is difficult, use a dehydrator with automated airflow or dry herbs in smaller, thinner batches to reduce turning frequency)
- Ready when completely crisp (3-10 days)
DIY screen options:
- Window screens
- Dehydrator trays (use without heat)
- Baking racks covered with cheesecloth
- Stackable mesh drying racks
Method 3: Food Dehydrator (Best for: Everything, especially in humid climates)
Good for: All herbs; ESPECIALLY good if you live in humid areas
How to:
- Spread herbs in single layer on dehydrator trays
- Set temperature to 35-43°C — this is crucial!
- Check every 2-4 hours
- Ready when herbs crumble easily (3-8 hours typically)
Why dehydrators are worth it:
- Consistent, controlled temperature
- Built-in airflow
- Works regardless of weather
- Fast (saves time and preserves more compounds)
- Can dry in humid conditions
Cost: NZ$80-250 for a good dehydrator. Worth the investment if you dry herbs regularly.
Budget option: Look for second-hand dehydrators on Trade Me or in op shops. Many people buy them and rarely use them. A basic model is often enough for home herb drying.
Where to buy in NZ:
- The Warehouse (budget models ~$80-120)
- Briscoes, Farmers
- Commonsense Organics (specialist stores)
- Online: Trade Me, Mighty Ape
Temperature matters: Some cheaper dehydrators only have high-heat settings (60°C+). These are too hot for herbs, especially those rich in volatile oils (like mint, lavender, thyme). While some non-aromatic herbs can tolerate slightly higher temperatures, it’s best to choose a dehydrator with adjustable temperature control down to 35°C.
Method 4: Paper Bag Drying (Best for: Seedy herbs and flowers)
Good for: Elderflowers, herbs going to seed, delicate flowers
How to:
- Place herb stems or seed heads in paper bag
- Punch holes in bag for airflow
- Close top with rubber band
- Hang in warm, dry, dark place
- Shake periodically to redistribute
- Seeds will fall to bottom of bag as they dry
Why this works: Bag catches falling seeds/petals while allowing airflow
Drying Times by Plant Part
Leaves & Flowers: 3-14 days (depending on moisture content and method)
- Thin leaves (mint, lemon balm): 3-7 days
- Thick leaves (comfrey, plantain): 7-14 days
- Flowers (calendula, chamomile): 5-10 days
Roots & Bark: 1-3 weeks
- Slice thinly (5mm rounds) for faster drying
- Turn daily
- Takes much longer due to density
Berries: 2-5 days
- Depends on size and juiciness
- Turn frequently
These are estimates. Your actual time depends on:
- Humidity level
- Temperature
- Airflow
- How thick you’ve spread herbs
- Moisture content of the plant
How to Tell When Herbs Are Completely Dry
The Tests:
1. Crumble Test (for leaves):
- Take a leaf between your fingers
- It should crumble easily to dust
- If it bends instead of breaking, it needs more time
2. Snap Test (for stems):
- Bend a stem
- It should snap cleanly, not bend
- Bending = still has moisture
3. Feel Test:
- Dried herbs should feel crisp, almost brittle
- No leathery or bendable feeling
- No moisture when squeezed
4. Jar Test (for confirmation):
- Put a handful of “dry” herbs in a sealed jar
- Leave 24 hours
- Check for condensation on inside of jar
- If condensation appears, herbs need more drying time
Why complete dryness matters: Even 10-15% moisture left can cause mold in storage. Better to over-dry slightly than under-dry.
Common Drying Mistakes (and How to Fix Them)
✖ Mistake 1: Overcrowding
Problem: Herbs touching each other = trapped moisture = mold
Solution: Spread herbs out generously. It’s better to do multiple batches than cram everything together.
✖ Mistake 2: Too Much Heat
Problem: High temperatures = loss of volatile oils and vitamins
Solution: Keep temperature under 43°C. If using oven, use lowest setting (usually too hot for herbs) with door ajar.
✖ Mistake 3: Drying in Light
Problem: Light degrades medicinal compounds and causes colour loss
Solution: Choose a dark location or cover herbs
✖ Mistake 4: Not Enough Airflow
Problem: Stagnant air = slow drying = mold risk
Solution: Use a fan, choose an airy location, don’t seal herbs in enclosed spaces
✖ Mistake 5: Storing Before Completely Dry
Problem: Any moisture left = mold in jars
Solution: Do the jar test. Be patient. Extra day of drying is better than a moldy batch.
✖ Mistake 6: Leaving Herbs to Dry Too Long
Problem: Collecting dust, losing potency, taking up space
Solution: Check daily. Process as soon as fully dry.
Special Considerations for NZ Conditions
High Humidity Regions (Auckland, Northland, Coastal Areas)
Challenges:
- Slower drying times
- Higher mold risk
- May need supplemental heat even in summer
Solutions:
- Invest in a dehydrator: This is genuinely the best solution for humid climates
- Use a dehumidifier in your drying room
- Dry in smaller batches: Less risk of mold
- Check more frequently: Catch any mold early
- Choose drier times of year: Autumn is often drier than summer in humid regions
Can’t afford a dehydrator? Try these free or low-cost options:
- Drying in your car on a hot day: Park in shade, crack windows for airflow, place herbs on screens on dashboard
- Use a warm (not hot) HWC: Hot water cupboard with door ajar
- Create a solar dryer: Cardboard box lined with black paper, window screen shelf, transparent plastic cover angled to sun
- Time your harvest: Choose the driest week of the month, harvest after several dry days
- Maximise natural airflow: Hang near ceiling where warm air rises, use multiple small fans on low
Drier Regions (Central Otago, Canterbury)
Advantage: Faster, easier drying
Still need: Darkness and good airflow (don’t skip these!)
Seasonal Considerations
Summer (December-February): Generally easier drying due to warmth, but can be humid
Autumn (March-May): Often ideal (drier air, still warm)
Winter (June-August): Slower drying due to cold; may need gentle heat source
Spring (September-November): Variable—often humid
What to dry when in NZ:
- Summer: Lavender, rosemary, calendula, chamomile
- Autumn: Seeds, roots, late-season flowers
- Winter: Indoor-grown herbs, purchased bulk herbs for practice
- Spring: Early greens, first harvests, young leaves
After Drying: Next Steps
1. Strip Leaves from Stems (if applicable)
Once fully dry, remove leaves from stems by running your hand down the stem. Stems don’t add medicinal value for most uses.
Exception: If you want to make herb bundles for aesthetic reasons, leave on stems.
2. Crumble or Leave Whole?
Whole leaves: Last longer (12-18 months), retain potency better
Crumbled: Easier to use, measure, and make tea, but degrades faster (6-12 months)
Best practice: Store whole, crumble as needed for use.
Pro tip: Store in portions you’ll use within 2 weeks. Opening jars repeatedly exposes herbs to air and light, degrading them faster.
3. Check for Any Mold
Inspect carefully. If you see ANY mold (fuzzy white, grey, or green growth), discard entire batch. Mold is not safe.
4. Storage (Covered in detail in the Storage Guide)
Quick version:
- Airtight jars (glass is best)
- Dark location
- Cool temperature
- Label with herb name and date
Drying NZ Native Herbs
NZ Native Herbs: Kawakawa, horopito, and other native plants can be dried using these same methods.
Important cultural and sustainability considerations:
- Harvest sustainably: Maximum 1-2 leaves per plant; spread harvest across multiple plants
- Harvest with respect: These are taonga (treasured plants)
- Best drying method: Gentle air-drying or dehydrator at 35-38°C to preserve delicate compounds
- For traditional rongoā Māori uses: Please consult with qualified rongoā practitioners. This guide covers Western herbalism approaches to drying and does not replace traditional Māori healing knowledge systems.
Kawakawa drying notes:
- “Holey leaves” (insect-damaged) are culturally significant and indicate robust plants
- Dry in darkness to preserve green colour
- Ready when crisp but still aromatic (3-7 days)
Quick Reference: Drying Methods by Herb Type
| Herb Type | Best Method | Temperature | Time |
|---|---|---|---|
| Leafy herbs (mint, basil, lemon balm) | Hanging bundles or dehydrator | 35-40°C | 3-7 days |
| Woody herbs (rosemary, thyme, sage) | Hanging bundles | 35-43°C | 5-10 days |
| Flowers (calendula, chamomile) | Screens or dehydrator | 35-38°C | 5-10 days |
| Roots (dandelion, burdock) | Dehydrator (sliced thin) | 38-43°C | 1-3 weeks |
| Berries (elderberry, rose hips) | Dehydrator | 38-43°C | 2-5 days |
| NZ natives (kawakawa, horopito) | Air-drying or dehydrator | 35-38°C | 3-7 days |
Quality Check: Good vs Poor Dried Herbs
Examples of what to look for:
✅ Good quality dried mint:
- Bright green colour
- Snaps cleanly when touched
- Strong, fresh aroma when crumbled
❌ Poor quality dried mint:
- Brown or faded colour
- Bends when touched (still moist)
- Musty or weak smell
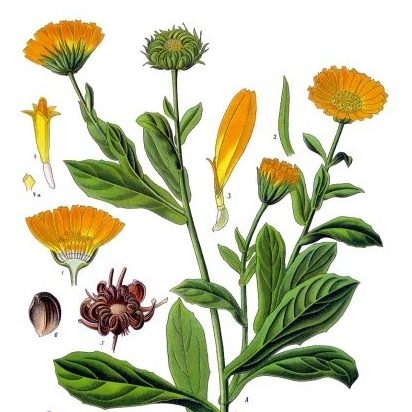
✅ Good quality dried calendula:
- Golden-orange petals, vibrant
- Crisp petals that crumble
- Strong, resinous smell
❌ Poor quality dried calendula:
- Faded white or pale yellow
- Feels damp or leathery
- Little to no smell
If your herbs look like the “poor quality” examples: They may have been dried incorrectly (too slow, too hot, or in light) or stored improperly. They’ll have reduced potency and may not be safe if mold is present.
First-Timer Success Path
New to herb drying? Start here:
Week 1: Try mint or rosemary (easiest, most forgiving)
- Method: Hanging bundles (free, simple)
- Goal: Learn to recognise “completely dry”
- Success indicator: Leaves crumble to dust, stems snap
Week 2-3: Try calendula or chamomile flowers
- Method: Screens or dehydrator
- Goal: Practice delicate handling
- Success indicator: Petals crisp, colours bright
Month 2: Experiment with roots or berries
- Method: Dehydrator (sliced roots) or screens (berries)
- Goal: Master timing for dense materials
- Success indicator: No moisture when squeezed, snap test passes
Month 3: Try native herbs
- Method: Gentle air-drying
- Goal: Respectful, sustainable harvest and preservation
- Success indicator: Aromatic, colourful, culturally appropriate
Final Thoughts
Drying herbs is straightforward once you understand the principles:
- Warmth (not heat)
- Airflow (absolutely essential)
- Darkness (protect those compounds)
- Patience (don’t rush it)
Start with an easy herb like mint or rosemary. Master the process. Then expand to more delicate herbs.
Your dried herbs should:
- Retain their colour (faded = degraded)
- Smell strongly when crumbled (aromatic = potent)
- Crumble easily (crisp = fully dry)
If they meet these criteria, you’ve succeeded. You now have shelf-stable medicine that will last 6-18 months.
Happy drying!
Sources & Further Reading
Books:
- Green, J. (2000). The Herbal Medicine-Maker’s Handbook: A Home Manual. Chelsea Green Publishing.
- Cech, R. (2000). Making Plant Medicine. Horizon Herbs.
Extension Services:
- Penn State Extension. Let’s Preserve: Drying Herbs. extension.psu.edu
- Oregon State University Extension. Drying Herbs. extension.oregonstate.edu
Scientific Articles:
- Müller, J., & Heindl, A. (2006). Drying of medicinal plants. In: Medicinal and Aromatic Plants. Springer.
Disclaimer: This guide is for educational purposes only. Properly dried herbs are essential for safe herbal preparations. Moldy herbs should be discarded completely. Always use clean equipment and practice good hygiene throughout the drying process. When in doubt about herb quality, err on the side of caution and discard.
Note on Pricing: All prices mentioned in this guide are approximate and based on New Zealand suppliers as of December 2025. Prices vary by supplier, season, and market conditions. We recommend checking current prices with your local suppliers.
