
A Practical Guide to Affordable Plant Medicine
Herbalism doesn’t require expensive supplements, fancy equipment, or rare imported herbs. Some of the most powerful plant medicines grow as “weeds” in your backyard, and your kitchen probably already contains effective medicinal herbs. This guide will show you how to build a solid herbal practice without breaking the bank.
The Truth About Cost
The expensive myth: Many people think herbalism means buying lots of tinctures, supplements, special equipment, and exotic herbs from specialty shops.
The reality: The most effective herbal practice often uses common, inexpensive (or free) plants prepared simply at home.
Your ancestors didn’t have health food stores or online herb suppliers. They used what grew around them, shared knowledge with their communities, and kept their families healthy. Māori have maintained rongoā traditions for centuries using plants from the local environment. You can do exactly the same.
Why this matters: If cost is preventing you from starting with herbs, you’re missing out on accessible, effective healthcare that’s literally growing around you. Budget herbalism isn’t about cutting corners—it’s about being resourceful and connecting with local plants.
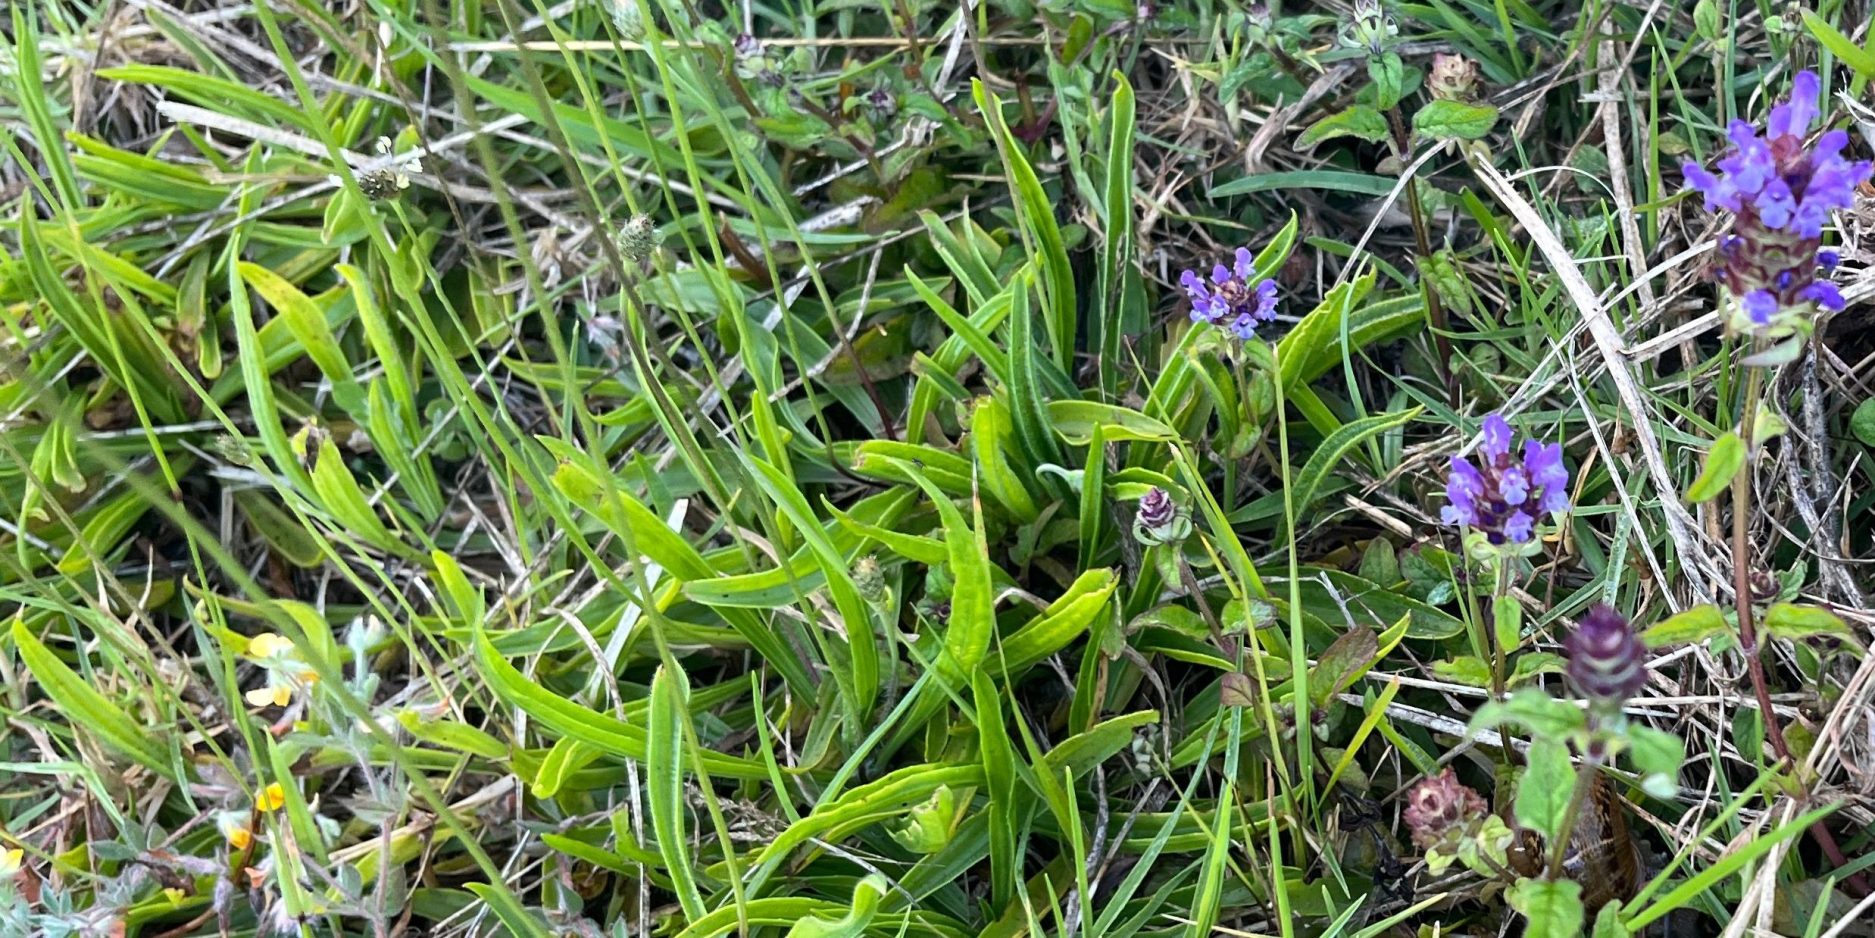
Free Herbs: Safe Foraging in New Zealand
Many common “weeds” are valuable medicinal herbs. Once you learn to identify them confidently, you have a free, renewable supply of medicine.
A note on “free”: Throughout this section, we refer to foraged herbs as “free” in terms of monetary cost. Of course, foraging requires an investment of time—learning identification, traveling to foraging sites, and harvesting. However, many people find this time enjoyable and educational, and the monetary savings are substantial. When we say “free,” we mean no purchase cost, though your time investment has value.
Easy-to-Identify Plants for Beginners
𓇢𓆸 Dandelion (Taraxacum officinale)

- Where: Lawns, parks, fields—everywhere in NZ
- What to harvest: Leaves (spring), flowers (spring/summer), roots (autumn)
- Uses: Leaves support digestion and are nutritious in salads; roots support liver health; flowers make wine or fritters
- Identification: Bright yellow flowers, deeply toothed leaves in a rosette, white milky sap
- Cost savings: $25-50/100g dried root in stores vs. free to forage
- Why this matters: One dandelion plant can provide leaves for salads, roots for tea, and flowers for cooking—all completely free
🌱 Plantain (Plantago major/lanceolata—not the banana)


- Where: Lawns, pathways, disturbed soil throughout NZ
- What to harvest: Leaves anytime they’re green
- Uses: First aid for minor cuts, bug bites, and stings; tea for coughs and digestive support
- Identification: Distinctive parallel veins running the length of the leaf (most plants have branching veins)
- Cost savings: $20-35/100g in stores vs. free to forage
- Why this matters: Plantain is probably growing in your lawn right now. Fresh leaves crushed and applied to bug bites provide instant relief
🌱 Chickweed (Stellaria media)

- Where: Garden beds, cool shady areas (grows year-round in most of NZ)
- What to harvest: The whole above-ground plant
- Uses: Soothes itchy skin, nutritious in salads, supports skin healing
- Identification: Small oval leaves, tiny white star-shaped flowers, single line of hairs up the stem that changes sides at each leaf node
- Cost savings: $20-35/100g in stores vs. free to forage
- Why this matters: Chickweed grows abundantly in cooler months when other greens are scarce—free food and medicine
🇳🇿 Kawakawa (Piper excelsum)

- Where: Native to NZ, forests and bush areas, increasingly in gardens
- What to harvest: Leaves (best before flowering)
- Uses: Traditional Māori medicine for digestive issues, skin conditions, pain relief
- Identification: Heart-shaped leaves with a peppery scent when crushed, often with insect holes (traditionally considered more potent)
- Cultural note: This is a taonga (treasure)—harvest respectfully with karakia if appropriate, never over-harvest. For traditional rongoā applications and protocols, please consult qualified rongoā practitioners.
- Cost savings: $35-70/100g in stores vs. free if you have access to bush or grow your own
- Why this matters: Kawakawa connects you to the unique healing traditions of Aotearoa and grows beautifully in NZ gardens
🌿 Purslane (Portulaca oleracea)

- Where: Gardens, cracks in pavement, disturbed ground (loves heat)
- What to harvest: Succulent leaves and stems
- Uses: Exceptionally high in omega-3 fatty acids (rare for a plant), nutritious in salads, cooling for inflammation
- Identification: Thick, succulent reddish stems, small paddle-shaped leaves, yellow flowers
- Cost savings: Free wild food with exceptional nutrition
- Why this matters: Purslane contains exceptionally high omega-3 fatty acids for a plant source—making it a completely free nutritional powerhouse
🌿 Cleavers (Galium aparine)

- Where: Damp, shady spots, gardens, under hedges
- What to harvest: Young shoots in spring (top 10-15cm)
- Uses: Lymphatic support, spring cleansing, mild diuretic
- Identification: Square stems, leaves in whorls of 6-8, sticky Velcro-like texture, small white flowers
- Cost savings: $20-35/100g in stores vs. free to forage
- Why this matters: Cleavers is a traditional spring tonic that grows prolifically—harvest a bagful in minutes
Foraging Safety Rules
Safety (Non-Negotiable):
- Be 100% certain of identification before harvesting—use at least two reliable field guides
- Never harvest from areas treated with pesticides or herbicides
- Avoid roadsides within 10 metres (pollution from vehicles)
- Don’t harvest from areas where dogs walk (parasites, bacteria)
- Wash everything thoroughly before use
- Start with a small amount to test for personal sensitivities
Ethics:
- Take only what you’ll use
- Never take more than 10% of a plant population in any area
- Leave plenty for wildlife and reproduction
- For native plants like kawakawa, be especially conservative
- Don’t harvest rare or endangered plants
- Get permission if on private land
- Respect Māori cultural protocols for native plants
Learning to Forage in NZ:
- Your local library has NZ field guides (free)
- iNaturalist app helps identify plants from photos (strong NZ community)
- YouTube has NZ-specific plant identification videos
- Local plant walks and workshops (often free or low-cost)
- Start with 1-2 plants and learn them thoroughly before adding more
Kitchen Herbs That Double as Medicine
You probably already have medicinal herbs in your kitchen. Stop thinking of them as just cooking ingredients and start using them therapeutically.
Already (probably) in Your Spice Rack
Ginger (Zingiber officinale) 🫚

- Medicinal uses: Nausea relief (including morning sickness), digestive support, anti-inflammatory, circulation support
- How to use medicinally: Fresh ginger tea (15-20g simmered 10 minutes), crystallised ginger for nausea, ginger honey
- Why this matters: Ginger is one of the most researched anti-nausea remedies. It works—fast. Keep it on hand for stomach upset.
- Cost: $3-6/100g fresh root at NZ supermarkets (already have it)
Turmeric (Curcuma longa) 🫚

- Medicinal uses: Reduces inflammation, supports digestion, antioxidant, joint health
- How to use medicinally: Golden milk (turmeric + milk + black pepper + honey), add to soups
- Why black pepper matters: ontains piperine which increases turmeric absorption by up to 20-fold, making it much more effective
- Cost: $4-8 for a jar that lasts months (already have it)
Cinnamon (Cinnamomum verum/cassia) 🪵

- Medicinal uses: Supports healthy blood sugar, warming for digestion, antimicrobial, circulation
- How to use medicinally: Add 2.5ml (½ tsp) to tea, make cinnamon honey, sprinkle on food
- Why this matters: Cinnamon helps moderate blood sugar spikes—useful after sweet foods
- Cost: Already have it
Garlic (Allium sativum) 🧄

- Medicinal uses: Immune support, cardiovascular health, antimicrobial, blood pressure support
- How to use medicinally: Eat raw (crush and let sit 10 minutes first to activate compounds), make honey-fermented garlic
- Why crushing matters: Releases allicin, the primary medicinal compound
- Cost: $2-4 per bulb at NZ supermarkets (already have it)
Thyme (Thymus vulgaris) 🌿

- Medicinal uses: Respiratory support, antimicrobial, excellent for coughs and chest congestion
- How to use medicinally: Strong tea for coughs (5ml/1 tsp per cup), steam inhalation, honey infusion
- Why this matters: Thyme’s volatile oils are expectorant—they help you cough up mucus productively
- Cost: Already have it
Cayenne (Capsicum annuum) 🌶️

- Medicinal uses: Improves circulation, pain relief (topical), digestive stimulant
- How to use medicinally: Tiny pinch in tea for circulation, mixed in oil for sore muscles (test on small area first)
- Safety: Very hot—start with minuscule amounts
- Cost: Already have it
Sage (Salvia officinalis) 🌱

- Medicinal uses: Sore throat relief, reduces sweating (hot flashes, night sweats), cognitive support
- How to use medicinally: Gargle strong tea for sore throat, drink tea for excessive sweating
- Why this matters: Sage is one of the most effective herbs for reducing sweating—helpful for menopause
- Cost: Already have it
Growing Your Own Medicine in NZ
Herbs that grow easily from grocery store produce or garden centres:
Ginger: Plant a piece of fresh ginger root in a pot, harvest in 8-10 months (grows well in warmer parts of NZ, bring pots inside in winter in cooler areas)
Peppermint: Buy a plant for $5-8, it multiplies endlessly (keep it in a pot or it will take over your garden!)
Basil: Grow from seed ($3-5 per packet) or root supermarket basil in water, then plant (grows beautifully in NZ summers)
Rosemary: One $8-12 plant lasts years with minimal care (thrives in NZ climate, drought-tolerant once established)
Lemon Balm: $5-10 per plant, spreads readily, perennial (makes delicious calming tea)
Calendula: Easy from seed ($3-5 per packet), self-seeds prolifically (beautiful flowers, excellent for skin healing)
Aloe Vera: Buy one plant for $10-20, it produces “babies” you can separate and repot (amazing for burns and skin)
Kawakawa: Native plant, available at native nurseries $15-25, supports local ecosystems (grows well in shade)
Lavender: $8-15 per plant, perennial, drought-tolerant (calming, versatile, beautiful)
Total investment: $30-80 for years of fresh medicinal herbs
Why growing matters: One $8 rosemary plant provides fresh herbs for years. Store-bought dried rosemary costs $4-6 for 15g. You’ll save that in the first few months, then have free rosemary forever.
Buying Smart in New Zealand
When you do need to buy herbs, here’s how to get the most value.
Where to Buy
Best value in NZ (ranked):
- Bulk bins at health food stores – Many health food stores and co-ops have bulk herb sections where you can buy exactly the amount you need (best price per gram)
- Online NZ suppliers – Several NZ-based suppliers offer bulk herbs online with good selection and competitive pricing
- Asian supermarkets – Chinese, Indian, Korean supermarkets often have medicinal herbs at better prices
- Farmers markets – Sometimes have herb vendors with competitive prices and local products
- Buying clubs – Split bulk orders with friends (halve shipping costs)
Avoid:
- Pre-packaged supplements in capsules (paying for packaging and processing—huge markup)
- Small decorative jars at chain stores (500%+ markup on herbs)
- MLM herbal products (overpriced with misleading claims)
How Much to Buy
Start small: Buy 25-50g of a dried herb to start. This makes 15-30 cups of tea (enough to know if you like it).
Once you know you like it: Buy larger amounts (100-250g or more). Price per gram drops significantly with bulk.
Example—Chamomile:
- 25g: $8 ($320/kg)
- 100g: $18 ($180/kg)
- 250g: $35 ($140/kg)
Shelf life: Most dried herbs stay good for 1-2 years if stored properly (airtight container, cool, dark, dry location).
Most Economical Herbs
These herbs give you the most benefit for the lowest cost:
Nettle (Urtica dioica) – $10-20/100g bulk
- Why: Incredibly nutritious, use daily as tea, rich in minerals

Chamomile (Matricaria chamomilla) – $10-20/100g bulk
- Why: Gentle, safe, versatile (sleep, digestion, anxiety), pleasant taste
Peppermint (Mentha × piperita) – $7-15/100g bulk
- Why: Digestive powerhouse, refreshing, blends well with other herbs

Calendula (Calendula officinalis) – $14-28/100g bulk
- Why: Amazing for skin, a little goes a long way in oils/salves

Oatstraw (Avena sativa) – $7-14/100g bulk
- Why: Nourishing, calming, mineral-rich, mild flavour

Red Raspberry Leaf (Rubus idaeus) – $10-20/100g bulk
- Why: Tones reproductive system, rich in nutrients, pleasant taste

Why these herbs: They’re versatile (multiple uses), effective, safe for daily use, and widely available at good prices.
DIY Everything: Making Your Own Preparations
Making your own herbal preparations saves enormous amounts of money and isn’t difficult.
Cost Comparisons
Store-bought vs. Homemade:
Tincture:
- Store-bought: $20-35 for 30ml
- Homemade: $8-15 for 120ml (dried herb $10 + vodka $8 makes multiple tinctures)
- Potential savings: 75%+ compared to commercial products
Salve:
- Store-bought: $15-25 for 60ml
- Homemade: $10-15 for 240ml (herb $10 + oil $5 + beeswax $8 = several jars)
- Potential savings: 70%+ compared to commercial products
Tea Blend:
- Store-bought: $12-18 for 16 tea bags (approximately 24g)
- Homemade: $8-12 for 100g (50+ cups)
- Potential savings: 60%+ compared to commercial products
Why this matters: Making a batch of salve costs $15 and provides you with gifts for 4-5 people, plus your own supply. That’s medicine + gifts for less than buying one jar.
Easy DIY Recipes
All-Purpose Healing Salve
Cost: About $15 for 240ml (4 small jars)
Ingredients:
- 250ml olive oil
- 30g dried calendula
- 30g dried plantain (or substitute more calendula)
- 30g beeswax pellets
Instructions:
- Combine oil and herbs in glass jar
- Place jar in pot with water (double boiler method)
- Gently heat 2-4 hours (oil should be warm but not bubbling)
- Strain through cheesecloth, squeezing to extract all oil
- Melt beeswax into strained oil
- Pour into clean jars
- Allow to cool completely before capping
Uses: Cuts, scrapes, dry skin, nappy rash, minor burns, chapped lips, eczema
Shelf life: 1 year in cool, dark location
Why this matters: This one recipe replaces multiple commercial products: first aid ointment, lip balm, hand cream, nappy cream.
Immune Support Tea Blend
Cost: About $12 for 100g (50+ cups)
Ingredients:
- 30g peppermint leaf
- 30g elderflower (or substitute more peppermint and add 20g thyme)
- 15g ginger root (dried and chopped)
- 15g rose hips (or substitute lemon peel)
- 10g thyme leaf
Instructions:
- Combine all herbs in bowl
- Mix thoroughly
- Store in airtight jar
- Use 5ml (1 tsp) per cup of boiling water
- Steep 10 minutes, strain
Uses: At first sign of cold, during flu season, for respiratory support
Shelf life: 1 year in airtight container
Why this matters: Commercial immune tea blends cost $12-18 for 16 bags. You’ve made 50+ cups for the same price.
Sleepy Time Tea Blend
Cost: About $10 for 80g (40+ cups)
Ingredients:
- 30g chamomile flowers
- 20g lemon balm leaf
- 15g lavender flowers
- 15g catnip leaf (or substitute more chamomile)
Instructions:
- Combine all herbs
- Store in airtight jar
- Use 5ml (1 tsp) per cup
- Steep 10-15 minutes covered (keeps volatile oils in)
Uses: Before bed, for anxiety, for restless children (age-appropriate doses)
Shelf life: 1 year
Why this matters: Sleep aids are expensive. This blend costs cents per cup and works gently without side effects.
Digestive Bitters
Cost: About $15 for 250ml (6+ months supply)
Ingredients:
- 15g dried dandelion root
- 15g dried orange peel (or fresh, dried yourself)
- 10g ginger root
- 5 cardamom pods (crushed)
- 250ml vodka (cheapest available, 37%+ alcohol)
Instructions:
- Combine all herbs in glass jar
- Pour vodka over to cover completely
- Seal and label with date
- Shake daily for 4-6 weeks
- Strain through coffee filter or cheesecloth
- Store in dark bottle
Dosage: 2.5-5ml (½-1 tsp) in small amount of water before meals
Uses: Improves digestion, stimulates digestive juices, reduces bloating
Shelf life: 3-5 years
Why this matters: Bitters work by stimulating bitter taste receptors which trigger digestive secretions. Commercial bitters cost $25-40. You’ve made 6 months supply for $15.
Free Equipment Alternatives
You don’t need specialised equipment. Repurpose what you possibly already have.
Instead of specialised tools:
- Tea strainer → Coffee filter or clean cloth
- Cheesecloth → Old clean t-shirt or flour sack towel
- Amber glass bottles → Reused glass jars from pickles, jam, sauce (store in dark cupboard)
- Double boiler → Glass jar sitting in pot of water
- Measuring scale → Measuring spoons and cups work fine for most recipes
- Tea ball → Make tea in jar, strain through coffee filter
- Labels → Masking tape and marker
- Mortar and pestle → Rolling pin and zip-lock bag (for crushing seeds/roots)
- Dehydrator → Well-ventilated warm room or oven on lowest setting with door ajar
Why this matters: You can start making herbal remedies with equipment you already own. Don’t let lack of “proper” tools stop you.
Money-Saving Mindset Shifts
Focus on Prevention
The most budget-friendly approach: Use herbs to support health proactively rather than waiting until you’re unwell.
Daily nourishing herbal teas (nettle, oatstraw, red clover) cost cents per day and support overall health. This is far cheaper than buying remedies when you’re sick.
Example: 100g nettle costs $15. At 2.5g per cup, that’s 40 cups = 37 cents per cup. Drinking this daily provides minerals, supports immunity, and costs $11/month. Compare to buying supplements or addressing health concerns when they arise.
Simple Over Complex
Expensive approach: Complicated tincture blends with 12 ingredients
Effective approach: One well-chosen herb prepared simply
More ingredients doesn’t mean more effective. Often a single herb works beautifully.
Example: For anxiety, a simple chamomile tea is often just as effective as an expensive multi-herb “stress formula.” Chamomile costs $10-20/100g. The commercial formula costs $25-35 for 30ml.
Relationship Over Consumption
Expensive approach: Buy every new herb you read about
Budget approach: Develop deep relationships with 10-15 herbs you use regularly
You don’t need 100 different herbs. Learn a core group really well, and they’ll serve most of your needs.
Why this matters: When you deeply know a small group of herbs, you understand their nuances—when to use them, how much, how to combine them. This knowledge is more valuable than a cupboard full of herbs you rarely use.
Your Budget Herbalism Starter Kit (NZ)
Total cost: $40-70 to get started properly
Must-haves:
- 25g chamomile ($8) – calming, digestive, sleep
- 25g peppermint ($6) – digestive, headaches, refreshing
- 25g calendula ($10) – skin healing (make into oil/salve)
- 25g nettle ($8) – nutritive, minerals, daily tonic
- 50g dried ginger root ($8) – nausea, digestion, circulation
- Olive oil (probably already have, or $5) – carrier oil for infusions
- 30g beeswax ($8) – for salves
- Glass jars (reuse what you have – FREE)
- Strainer (already have or $3)
- NZ field guide (library is free, or buy used $10-20)
This starter kit gives you:
- Two relaxing teas (chamomile, nettle)
- Digestive support (peppermint, ginger)
- A healing salve (calendula + olive oil + beeswax)
- Ability to start foraging safely (field guide)
Next steps (add as budget allows):
- Lavender ($8-12/25g) – calming, skin, headaches
- Thyme ($6-10/25g) – respiratory, antimicrobial
- Lemon balm plant ($5-10) – grow your own calming tea
- Rosemary plant ($8-12) – grow your own, multiple uses
Annual cost to maintain a solid practice:
- $100-200 if buying all herbs
- $40-80 if supplementing with foraging
- $20-40 if growing your own plus minimal purchased herbs
Why this matters: For less than what you’d spend on a few bottles of commercial supplements, you can start a complete herbal practice that serves you for a year.
Seasonal Money-Saving Strategies
Spring (September-November)
- Harvest wild spring greens (nettles, dandelion, chickweed, cleavers)
- Start seeds for summer garden ($3-5 per packet)
- Make fresh plant tinctures from new growth (higher potency)
- Dry herbs for year-round use (free if foraged)
Why spring matters: This is when the most free medicine is available. One day of foraging can stock your cupboard for months.
Summer (December-February)
- Solar-infuse oils with abundant herbs (free energy)
- Dry excess herbs from garden
- Make flower essences (calendula, lavender)
- Harvest and dry rose petals
- Create herbal ice cubes for later use (freeze fresh herbs in water)
Why summer matters: Peak growing season means abundance. Preserve the bounty now for winter use.
Autumn (March-May)
- Harvest roots (dandelion, burdock) for medicine (energy is stored underground)
- Gather seeds for next year’s planting (free seeds)
- Make elderberry syrup if available (immune support for winter)
- Dry autumn herbs (sage, rosemary cuttings)
Why autumn matters: Roots harvested in autumn have maximum medicinal potency. This is also when you can save seeds for next year—free plants.
Winter (June-August)
- Use dried herbs from summer harvest
- Make indoor windowsill gardens (fresh herbs year-round)
- Plan next year’s garden (free, productive activity)
- Make warming tea blends from stored herbs
Why winter matters: You’re using what you preserved earlier. This is when you see the value of your summer work—no need to buy expensive fresh herbs.
Community Resources and Skill Sharing
Free and Low-Cost Learning
Libraries:
- Free books on herbalism, foraging, plant identification
- Often have access to online databases with herbal research
- Some libraries offer seed libraries (free seeds!)
Online:
- YouTube has NZ-specific plant identification videos
- iNaturalist app (free plant ID help from community)
- NZ native plant websites (free identification resources)
- Herbal blogs and forums (free recipes and advice)
Local:
- Community gardens (learn from experienced gardeners)
- Plant walks (often free or koha-based)
- Herbal clubs and guilds (knowledge sharing)
- Farmers markets (talk to herb growers, learn sourcing)
Skill Sharing and Bartering
Organise herb swaps:
- Trade dried herbs with other herbalists
- Exchange herbal preparations (you make salves, friend makes tinctures)
- Swap plants and seeds
- Share bulk orders (split shipping costs)
Barter your skills:
- Teach someone to identify plants in exchange for herbal knowledge
- Trade garden produce for herbs
- Offer to help harvest in exchange for a share
- Create a medicine-making circle (everyone contributes herbs, everyone gets products)
Why this matters: Community makes herbalism more affordable AND more enjoyable. Sharing knowledge and resources benefits everyone.
When to Spend Money (Worth It)
Worth investing in:
- One good NZ field guide ($30-50) – years of safe foraging
- Quality bulk herbs you use frequently (buying 250g vs. 25g saves long-term)
- Plant identification class with experienced forager ($50-120) – safety investment
- Organic versions of herbs you consume daily (pesticide-free matters for regular use)
- Native plant from local nursery ($15-25) – supports ecosystems and local business
- Good quality carrier oils for medicine-making ($10-20) – olive, coconut oils last
Not worth it:
- Expensive supplement brands that are just marked-up dried herbs in capsules
- Fancy equipment when simple tools work fine
- Rare exotic herbs when local alternatives work as well
- Pre-made products you can easily make yourself
- Tiny decorative jars at chain stores (huge markup)
Why this matters: Strategic spending on education and bulk supplies saves money long-term. Wasting money on marketing and packaging doesn’t.
Troubleshooting Common Budget Concerns
“I don’t have space to grow herbs”
- Windowsill pots work for many herbs (mint, basil, parsley)
- One large container can grow multiple herbs
- Vertical growing (hanging pots) maximises space
- Community garden plot (often very affordable or free)
- Some councils offer free compost and seedlings
“I live in the city and can’t forage”
- City parks often have dandelion, plantain, clover (check spray schedules)
- Grow your own in containers
- Asian markets often have fresh medicinal herbs cheap
- Join a herb buying club
- Trade with friends who have gardens
“I can’t afford even basic supplies”
- Start with kitchen spices you already have (ginger, turmeric, garlic, cinnamon)
- Forage free herbs (plantain, dandelion)
- Ask friends/family to save glass jars for you
- Check op shops for equipment (jars, containers)
- Use library for books instead of buying
“I’m worried about making mistakes”
- Start with the safest herbs (chamomile, peppermint, plantain)
- Begin with external use (salves, washes) before internal
- Learn ONE plant thoroughly before adding more
- Take a free plant identification class (library, council)
- Join online herbal communities for guidance
“Organic herbs are too expensive”
- Foraged herbs are inherently “organic” (from unsprayed areas)
- Homegrown is organic if you don’t spray
- Prioritise organic for herbs you use daily in large amounts
- Conventional is fine for occasional use or external preparations
- Some herbs (like rosemary) are rarely sprayed even conventionally
Real Budget Breakdown: First Year of Herbalism
Starting from scratch with minimal budget:
Month 1: Free Start
- Cost: $0
- Forage dandelion leaves (salads, tea)
- Use kitchen ginger for tea
- Make garlic honey with what you have
- Borrow field guide from library
- Skills learned: Plant identification, simple preparations
Month 2: Minimal Investment
- Cost: $15-25
- Buy peppermint plant ($8)
- Buy 25g chamomile ($8)
- Reuse jars from kitchen
- New capabilities: Fresh mint tea daily, chamomile for sleep
Month 3: Building Momentum
- Cost: $20-30
- Buy calendula seeds ($5)
- Buy 50g nettle bulk ($10)
- Buy small beeswax ($8)
- New capabilities: Growing medicine, nutritive daily tea, can make salve
Months 4-6: Expanding
- Cost: $30-50 total
- Add 2-3 more herbs based on needs
- Start making tinctures (buy vodka once $15-20)
- Grow 2-3 more plants from seed
- New capabilities: Year-round medicine, tinctures, larger garden
Months 7-12: Established Practice
- Cost: $40-80 total
- Replace used herbs (buying in larger quantities now)
- Experiment with new preparations
- Preserve summer harvest
- State: Self-sufficient in many common remedies
First Year Total: $105-185
Compare to: Commercial supplements would cost $30-80/month = $360-960/year
Savings: $175-775 in first year, increasing each subsequent year
What Budget Herbalism Can Look Like
These scenarios illustrate how different people with different circumstances can successfully practice affordable herbalism:
Scenario 1: Urban Apartment Dweller Starting situation:
Small flat, no outdoor space, limited budget
Approach:
- Windowsill herb pots (mint, basil, parsley) – $20-30 for 3 pots
- Foraging in local parks after checking spray schedules with council
- Buying key herbs in bulk (chamomile, nettle) – $30-40 annually
- Using kitchen equipment for medicine-making
First year investment: $50-70 Ongoing annual cost: $30-50 What this provides: Daily herbal teas, basic first aid (plantain from foraging), simple preparations like infused oils and tea blends
Scenario 2: Small Backyard Garden Starting situation:
Quarter-acre section, wanting to reduce pharmacy costs
Approach:
- Growing 8-10 medicinal herbs from seed – $35-50
- Supplementing with foraged herbs (dandelion, plantain, cleavers)
- Making tinctures and salves from garden harvest
- Buying only specialty herbs can’t grow
First year investment: $100-150 (seeds, some bulk herbs, supplies) Ongoing annual cost: $40-80 (replacing supplies, seeds) What this provides: Most everyday remedies, gifts to share, significant reduction in OTC medicine purchases
Scenario 3: Cultural Connection Through Native Plants Starting situation:
Interested in rongoā, wants accessible entry point
Approach:
- Joining community garden ($40 annual fee)
- Planting kawakawa and other natives – $20-40
- Participating in herb swaps and knowledge sharing
- Learning from experienced gardeners and practitioners
First year investment: $60-80 Ongoing annual cost: $40-60 (mostly garden fees) What this provides: Growing connection to indigenous plant knowledge, native medicinal plants, community support, virtually free medicine after initial plantings
Why these scenarios matter: Budget herbalism looks different for everyone based on their situation, but it’s accessible regardless of living space, experience level, or budget constraints. The key principles remain the same: start small, use what’s available locally, learn as you go, and build gradually.
Final Thoughts
The most expensive herbalism is the kind you don’t practice because you think you can’t afford it.
Your ancestors practiced effective herbalism with no money at all. They used what grew around them, shared knowledge within their communities, and kept their whānau healthy. Māori have maintained rongoā traditions for centuries using plants from the local environment.
You can do exactly the same. The medicine growing as “weeds” in your lawn is just as powerful as expensive imported herbs. The kitchen spices you already own can support your health daily. A few plants grown from seed will provide medicine for years.
Budget herbalism isn’t about cutting corners—it’s about:
- Connecting with local plants
- Learning traditional skills
- Building relationships with the land
- Sharing knowledge and resources
- Accessing effective healthcare regardless of income
Start today:
- Go find some plantain or dandelion (free)
- Make a cup of ginger tea from your kitchen (free)
- Plant some basil or mint seeds ($3-5)
- Borrow a field guide from the library (free)
That’s herbalism. That’s accessible. That’s powerful.
Every person should have access to effective plant medicine, regardless of their budget. Now you know how.
Resources
Free Resources
Click here for details
Online:
- iNaturalist app – Plant identification
- New Zealand Plant Conservation Network (nzpcn.org.nz) – Native plant info
- Local council websites – Spray schedules, native plant guides
- YouTube – NZ-specific foraging and plant ID channels
Books (Library):
- A Field Guide to the Native Edible Plants of New Zealand by Andrew Crowe
- The Forager’s Treasury by Johanna Knox
- Māori Plant Use by Murdoch Riley
Community:
- Local libraries – Books, workshops, sometimes seed libraries
- Community gardens – Knowledge sharing, plant swaps
- Native nurseries – Often offer free advice
Scientific References
Click here for details
Cunningham, A. B. (2001). Applied Ethnobotany: People, Wild Plant Use and Conservation. Earthscan Publications.
Riley, M. (1994). Māori Plant Use: A Handbook of Plants Used by the Māori People of New Zealand. Manaaki Whenua Press.
Thayer, S. (2006). The Forager’s Harvest: A Guide to Identifying, Harvesting, and Preparing Edible Wild Plants. Forager’s Harvest Press.
Chevallier, A. (1996). The Encyclopedia of Medicinal Plants. DK Publishing.
Rongoā Māori Disclaimer: This guide does not represent rongoā Māori preparation methods or traditional Māori medicine-making. Rongoā Māori is a complete healing system with its own protocols, karakia (prayers), and cultural practices that cannot be separated from te ao Māori (the Māori worldview). For rongoā Māori knowledge and treatment, please consult qualified rongoā practitioners through Te Paepae Motuhake or other appropriate Māori health services.
Medical Disclaimer: This guide is for educational purposes only and is not medical advice. Herbal preparations can interact with medications, cause allergic reactions, and may be contraindicated in certain health conditions. Always consult qualified healthcare practitioners before using herbal medicines, especially if you are pregnant, nursing, taking medications, or have medical conditions. You are solely responsible for correct plant identification, safe preparation practices, and appropriate use. The information presented represents current scientific understanding, which continues to evolve. Persistent or severe pain requires professional medical evaluation.
A Note About Prices: The prices mentioned in this guide are approximate, based on typical New Zealand suppliers in late 2025. Herb prices fluctuate with seasons and suppliers, so your actual costs may vary. The good news? The money-saving strategies work regardless of whether chamomile costs $8 or $12—foraging is still free, growing your own still pays off, and making your own preparations still saves 60-80% compared to commercial products.